You can change some settings on your tinkerBOY Controller v3.0 by communicating with it via USB serial using a program called minicom.
Get Started
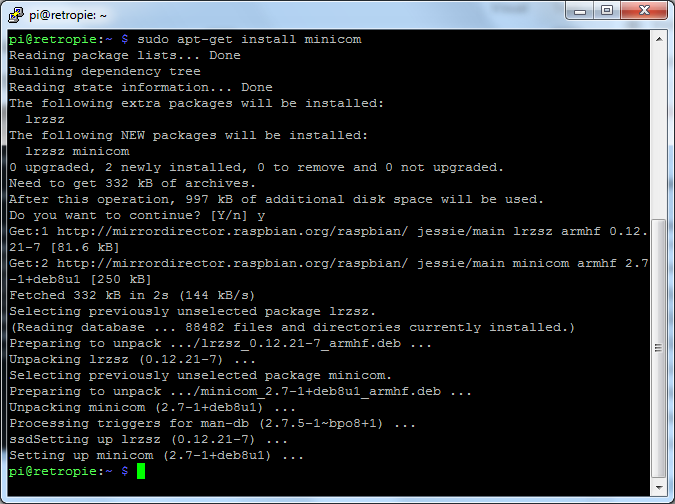
Login to your Pi via SSH or hit F4 to go to the command line. Install minicom by typing the following command:
sudo apt-get install minicom
Type “y” and press enter.

Wait for it to install.
Setup The Program
Before you can use minicom you need set it up to communicate with the your v3.0 board. Type the following:
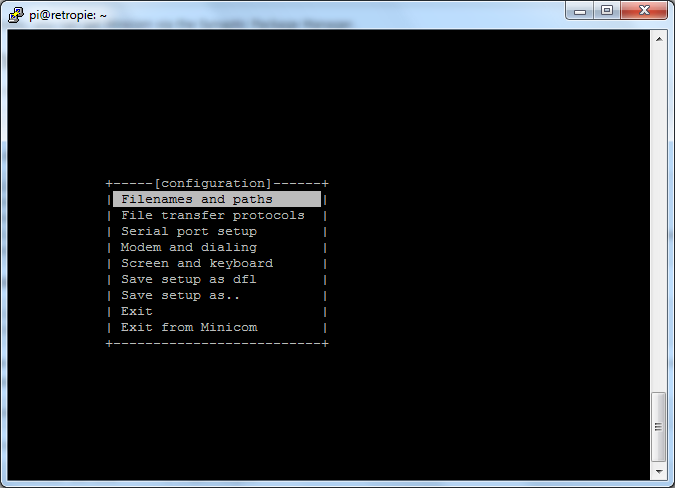
sudo minicom -s

Select “Serial port setup” and press enter. Press ‘a’ and change “Serial Device” to /dev/ttyACM0. Press enter twice and select ” Save setup as dfl”. Select “Exit” and press enter.
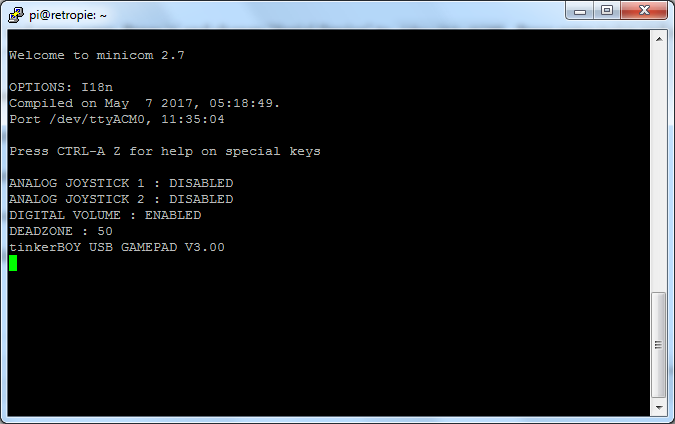
Commands you can use to display the status of a particular setting:
a – for displaying the current Analog Joystick settings.
d – for displaying the current Digital Volume setting.
v – for the current software version.
z – for the Deadzone value.

You can exit the program by “CTRL + A” then press ‘X’.
[…] With the builtin usb serial communication of the tinkerBOY Controller v3.0 you can easily enable or disable Analog Joysticks through software. In order to do that, you need install the minicom program by following the instruction at tinkerBOY Controller v3.0: Settings. […]
[…] With the builtin usb serial communication of the tinkerBOY Controller v3.0 you can easily enable or disable Analog Joysticks through software. In order to do that, you need install the minicom program by following the instruction at tinkerBOY Controller v3.0: Settings. […]
How can i adjust the deadzone settings?
Yes use the + and – key on your keyboard.
Hi, I’m working on my second Gameboy, and on this one I want to put an analog joystick. I’ve downloaded the pre-built OS twice now. I have a TinkerBoy Controller v3.0.1, but all that I can see in the minicom is TinkerBoy USB GAMEPAD v1.2. I have tested the joypad and it shows some input when I let the screen go darker, then when I move the joypad it “wakes up”, but it’s still not moving anything on screen. I have also adjusted the deadzone to zero. Is there no compatibility with Controller v3.0.1, but only Controller 3.0?
Just figured it out. I put a fresh install on an SD card, sudo raspi-config, then installed WIFI. Followed the instructions in this tutorial, and followed button setup for the first time, and it actually registered! I guess I missed a step somewhere, but it’s working now. Thanks for these tutorials, and your products are amazing!